Project Life: The Halt, The Mess of Crafting
It seems with teens growing, emotional and spiritual progress, house in constant “post-party” mode, and a lot of demands on us all, scrapbooking has taken a back seat. It feels like a “job” to do, and another mess. The odd thing is, my craft space seems a continual mess, regardless of progress. This is something I’m gradually tackling. By the time I get clean, winter…along with my time for reflection and crafting, will be over. Do I want to “mess” with the “mess”, just clean “the mess” or make something in the “mess”. I don’t know. I’m working on lettering and calligraphy more lately. It soothes me. The order. The form. The loveliness. In a winter of death, dying X about 6…in eight weeks time. I’m just needing that self time to heal, restore, and just enough family, not log it.
But, I’m missing pics of my teens at their most beautiful. I want more pics. I want to have them send me all their own favorite cell phone shots. No matter what I choose, they don’t like the pictures I take of them. LOL
And…I struggle for having everything set up. Space ordered. Card making, scrapbooking, school albums? WHAT is this space for? And how I do I manage multiple spaces and projects on different floors of the house? It all gets so complicated, and messy! So, I’m sort of stuck. Not sure where I’m headed. Just making it through winter. But, part of me is longing to create and enjoy and just embrace the life we have…not get bogged too much into the grief of what is loss…at least, not to the point that I miss the present. So, thankfulness, and embracing and rejoicing, celebrating, recording, noticing…all these I want to do. If it weren’t for the mess. LOL
Project Life by Season: My Thoughts
Okay, so there is no way I’m documenting every week. Just. Can’t. Too little space, too little time. I’ll do well to hit just “family life” and some seasonal stuff. Is anyone else doing it this way? Link up so I can see what you are doing.
I’m finding that all the “now”, “today”, and “days of the week” embellishments aren’t working for me. Even the signage may not be as appropriate. So, no trends are set for this approach.
My first friend is My Project Life Pinterest Board. I’ve pinned some pages, and now I’ll go back and see what it is I like about those pages. What stands out to me?
1. Yellow, red, and light blue color combos. This one is by: MomRunCraft (click photo to visit her very inspiring blog). 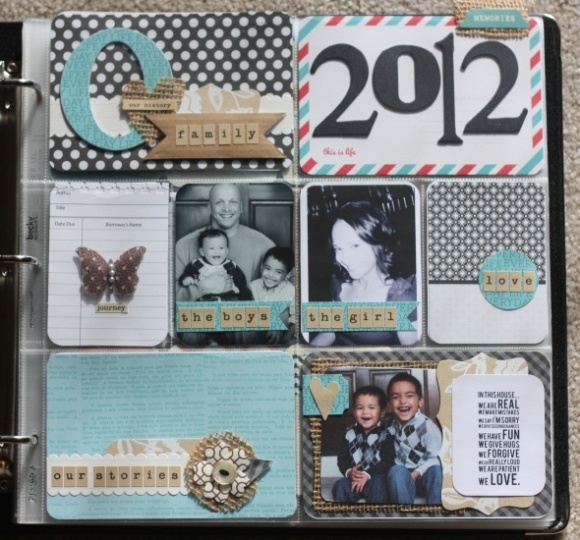
2. Some black and white photos so that the colors of the embellishments can “sing” at times. (see above photo)
3. Lots of photos. This one is also from MomRunCraft (love this girl’s work!) Also lovve all the use of tan.
4. Wood. I need some little wood pieces.
5. Buttons, but I don’t like the bulk. How can I substitute? Chipboard, perhaps?
6. Journaling within the photo area so that you aren’t trying to figure out what journaling goes with which photo as you look through the book.
7. Big titles. Like this one from Elle’s Studio. 
8. Layered cards…I need to go back through my albums and work on this. 
This one was pinned by Jennifer Hayes, but it didn’t have a backlink, so I’m not sure who to credit…love it, though! Wow. That’s a lot of gluing. I’ll have to muster that up.
9. Banners, ampersands, conversation bubbles, clouds & sun, coffee mugs, symbols: I’ve downloaded some cut files from Pinterest for these. Have to try to figure out how to fit them into family albums.

10. Words: Hello, Daily, Love,
Recently bought a 3X5 die for cropping photos for the small pockets more easily. This was annoying me. Would like to have one for the large pocket as well, but can’t find it at an economical price, so, for now, will cut and do corners with my little green Wal Mart corner rounder, or the black and hot pink Xacto one from Wal*Mart…matches best that I’ve found, and I’ve read mixed reviews on the corner chomper.
11. Tiny Attacher, by Tim Holtz, just bought one for small adhesions, can’t wait to get it in the mail!
Well, that’s all my thinking for today. Just wanting to solidify my game plan for my next go at this “thing”. Be sure to link up if you aren’t going about it in a “weekly” format so I can check out your stuff!
Owl Card for Fall

My daughter has been captivated by Pinterest as she is planning her 14th birthday party. As a result of this fetish, we are making tissue Pom-Pom flowers and fall owls for her upcoming party! I wanted to carry the theme to her card with a graphic feel owl using tissue paper flowers for the owl’s eyes. I am playing along JustRite Friday Challenge #084 – Flower Power to make a card using three flowers.
The two miniature tissue paper flowers for the owl’s eyes with a little brad in the center turned out SO CUTE! The third little flower embellishes the blue mat with a stamp using stamps from JustRite’s Times New Roman font set.
I don’t have a die set for making an owl, but I thought I love how Spellbinder’s Nestability Fancy Labels 3 Nestability served as the bones for the rest of the owl. I used Spellbinders Nestability Ovals and Scalloped ovals for the wings. The limb was made from the Doodle Parts Nestability die. The embossed background is” QuickCutz Label AZ”, inked with Memento’s Moonlight White for a misty effect. The yellow and orange matting were cut with the curved cutting tool that goes with my cutter.
Nestability dies: Oval, Circle, Oval Scallops, Doodle Parts, and Fancy Label 2, and Spellbinder’s Labels 18 for the light blue mat.
JustRite Stamps: Demi Celebrations (“Happy Birthday to You”), and Times New Roman, 15 point, and 95 point (flower, tiny corner flourishes, large flourishes at the bottom.)
Aren’t his little eyes the cutest ever? This pop right up off the card and stay fluffed no matter how many times I smush them, which is great for envelopes! I think I love owls as much as my daughter does. He’s just a hunk of cuteness.

Thanks for stopping by!
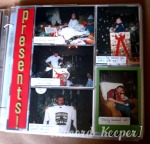
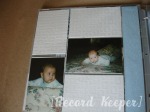
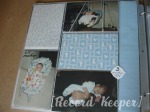
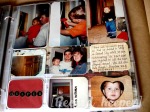
More Project Life

This is the hidden journaling referred to in a prior post. I’m still figuring out how to post from my iPod to avoid the photo upload process! I had not yet figured out how to include more than one photo per post!

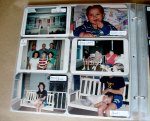
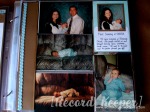
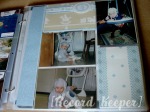
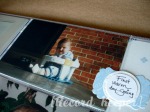
This is the graduation series continued. It was a two page spread with a smaller insert stuck between. Stickers were used for “GES” and my Cricut and SCAL for “grad”. There is a silver brad from my stash on the card with small PhotoSheet photos that says “joy” that I loved finding a perfect place to use (from my stash).

I also loved getting a pic of her adjusting her first dressy party shoes (for her first dance after graduation). That’s a benefit of always having a fast point and shoot source of photo-taking. I need to get my camera purse ready again to get these candid shots that I love.

Even though I don’t do the daily or weekly approach to Project Life for space, I like how these little personal pics give a sense of thankfulness to the smaller moments as part of bigger events.

The date is from the stamp that came with earlier kits (love it),
the journal sticker was from a kit I’d ordered online (Bella Rose, My Mind’s Eye).

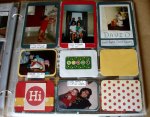
This used the Project Life Mimthly Title card as a basis for a photo layout. I had family visiters I wanted to include, but was running low on space to fit them in around focal pics of her, so this was a perfect solution. I really can’t recommend PhotoSheet free program enough, and it’s FREE!!! I cut side two of the 4×6 spread I created and cut one small one to fit the space.

The background on this one was distracting to me, a lot of greens and her dress was teal, so a black and white background helped, albeit an imperfect attempt.

So, that wraps up the graduation series. I think I calculated an ungodly number of graduations between the three kids in the next 20 years, so I should get good at them! (My Girl also from the kit I ordered online, let’s see, it’s a My Mind’s Eye series called Stella Rose).
Comment so I can share your Project Life journey! I’m getting a lot of fresh inspiration from Pinterest as well to fill in some holes and complete pages I had only partially finished. I like to work I phases, though, placing photos first, them adding things in as I find coordinating supplies, stubs, or inspiration to finish. It’s a work in progress for me!
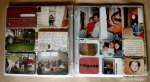
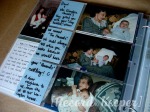
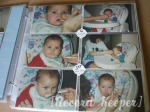
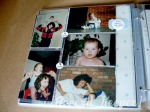
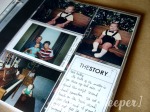
Page 3 Project Life

My daughter’s face throughout preschool and elementary was fun here. I did it with software that does face recognition. Very cool. On the back is a copy of the school prayer she was asked to do to open graduation. What an honor! She didn’t enjoy the draft in the album as much as I did, so I did it in hidden journaling on the back. I hope it makes us both happy.
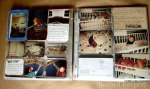
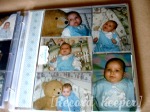
Graduation #1- Project Life Album

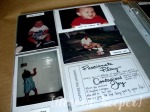
I decided to do “significant events” in my album by month. It is somewhat ordered, though throughout the album, a few pics are inserted where I needed a fill. I used my Cricut and SCAL for 2010 an the graduation hat, stickers by Cloud 9 Design, and PhotoSheet for the small pic. Love this free program for small pics for this project!
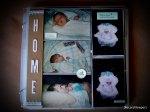
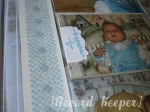
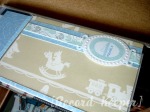
Title Page: Project Life (Evolving)

This is my working cover for my Project Life Album. I’m evolving it as I go, adding some brown and taking out some floral tonight to help it suit both my boys and my girl. I may do a family pic collage ultimately if the year’s represented in the album. Still mulling the title page.
Shabby Chic Birthday Card
This is a Shabby Chic card for the JustRite Stampers challenge for this week:

The Sentiment “demi phrases” I used are on sale at the JustRiteStampers.com website for $5! They are some of my very favorites.
This is the first Shabby Chic card I’ve made. I used a card to “case” from PaperCrafts magazine which uses the same set of demi-phrases (Mar/Apr 2010, Debbie Olson).
Thanks for stopping by!
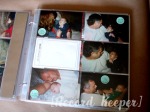
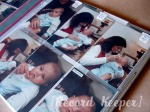
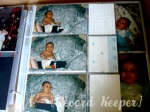
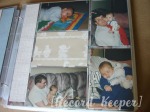
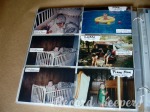
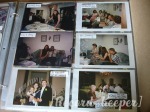
Project Life: Easiest Scrapbooking in the World
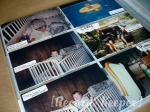
I have sifted through 14 years of duplicates this week and have completed six of those years in just two weeks. This method involves 12″ X 12″ divided page protectors, doing away with the need to crop (unless you want to), tape, or glue. It also takes care of that pesky problem with most slide-in photo albums of not having the correct orientation slides for your photos. The pages come in all sorts of sizes shapes, and orientations. I lay out the photos I want to go on a page, then choose the protector that suits the need for that page.
While there is space for creativity if you desire, you don’t even need that!
This method is great for when you have bulk work to do, or older photos you do not want to scan or risk damaging.
Here’s a slide-show for larger viewing if you have time to let it load. If not, the same photos are below (click on each to see it larger.)
These particular photo protectors are NOT the protectors that come with the official “Project Life” kit, nor does it take on the “daily” most people use that kit for. I am using their ideas to accomplish my own goals of doing photo back-log with various divided page projectors. I did not use most of the journaling cards that came with the kit for this project. After I get photos I already have printed caught up, I hope to use more of the actual kids for the “daily” journaling. I will probably still only use it as I feel like taking photos rather than “week by week” as most are using it. I think it takes something away from my photography to make a “to do” list out of it. I like to follow my own impulses more. But, we’ll see. For this “back log” of photos I’m tackling, I plan to go back and add in some writing/dates/detail to my project as time allows. For now, the photos are OUT OF SHOEBOXES! Yay me!
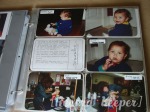
I put in all the photos that could go together in some sort of general order in the sleeves, then am going back to fill in titles or journaling as there is space. I mounted the 3.5X5″ inch ones on 4X6″ white cardstock and used the extra white space on the mat cardstock for journaling. In some cases, I wrote with a permanent marker on the plastic sleeve (see the home remodeling pages). It just seemed to work, though it may rub off…if so, fingernail polish remover takes it off. I’ll continue to work on journaling and labeling and making it pretty as I have time and patience. In some cases, I used my nestability dies, or office sticky labels for dates on top of the protectors. My rule of thumb for this amount of bulk is “photos first”. I didn’t have a great camera in those years, and each of the baby faces is special to me. I just want them in books for this one family album to enjoy. I can always pull out special ones to traditionally scrapbook for them as I desire later. I like journaling each photo with a sticker label for this amount of bulk, plus, it seems easier for my guys to follow than a lot of writing.
Ideas for labeling individual photos:
- A banker’s label punch worked great to fold and drape over the folder. I just added a smidge of dot runner tape to the back of the photo to keep it from sliding when I pushed both into the protector.
- In some cases, I made a paperclip label, especially when the protector allowed something to stick out of the top (some brand protectors slide from the side, making this impossible, while other photo slide from the top, making it possible).
- I plan to add a few page tabs to indicate the passing of the first year as soon as I can find them at a store.
-


Feel free to comment or add any questions. If you are doing Purpose Life and are posting your photos with titles were I can find you or are on the gallery at Project Life, chances are, I’ve been visiting you!
Products:
Divided Page ProtectorsAC Divided Page Protectors
8.5X11″ standard Page Protectors
Sharpies
SCAL, Cricut, and SVG cut files
Patterned Paper (Various)
Stickers, Labels
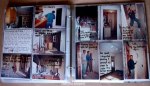
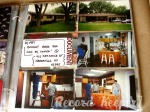
Journaling Older Photos Using Tabs and Labels

I posted a free SVG Label 4X4 insert, and friends wanted a visual for how it was used. The goal was to find a way to add in journaling for each photo where I could identify people, places, my age, or location quickly when needed without taking up a lot of space. While the photos were labeled on the back, after inserting them into these Nine Grid We R Memory Keepers Page Protectors, if was difficult to access that information. I needed to find a quick way to move that info to the front, so I made this 4X4 tabbed file in Sure Cuts a Lot (SCAL).

These page protectors are the perfect size for these older square 3.5″ X 3.5″ photos. (I am trimming the white edges off the vertical photos as they are a tad bit wider.) It’s been quick and easy– just a couple hours to slide them in, and no tape. I don’t mind if they slide around a bit in the spot. I want them secure and photo safe.
I pulled the old photos from the old sticky magnetic books. Loved those old books of Mom’s, but they were degraded, photos were falling out, and it was just time to move on. It only took some “Un-Do”to remove the stubbornly stuck photos quickly.
As an added bonus, when I removed a graduation photo of my mom with the Un-Do, I found another very small photo of her at about age 12 wedged behind it. I don’t have any other photos of her at that age, so it was a special treat!


Also shown are a couple photos of how I’m using punches to add journaling spots on pages where I don’t need paper inserts throughout the whole page.
For me right now, time, order, and telling the story are more important than being publisher-worthy. I want to use these prints in a meaningful ways before I move forward with more photo printing. It’s freeing me up to “not feel behind”. I figure these methods are easy to edit if I change my mind and want to do something more complex later. But, they can be enjoyed NOW.
Now, for the next shoebox of photos crammed under my bed! LOL


